What are the Patch Backings you keep talking about?
There are two ways to affix a patch of any kind to any garment, tote bag, or cap. Sewing it down, either on a single needle or multi needle embroidery machine, or use glue and cure the glue with heat. We strive to help our clients and customers have user friendly options to help their business quickly respond to orders, offer their clientele multiple solutions for project challenges, and reduce costs associated with production.
We currently offer three patch backings, we are sure that one of these patch backings can match the associated patch technique, with the specific needs of the end user. Each backing is applied with the end user in mind for a easy retail or application experience.
Patch Backings:
Iron On Backing:
Tried and true we spread a layer of heat activated adhesive to the back of the patch, the adhesive is then cured with heat for a permanent seal to just about any surface once heat pressed with the prescribed temperature and time.
Having a heat press with top and bottom heat would be the most production friendly process to affix the patches to garments. This is an ideal set up for any imprint production or small business. However a iron set to high heat with a cloth over the patch for protection works just fine for household uses. When using the iron press method, it is best to iron from the inside of the garment, this ensures the heat is hitting the adhesive and not damaging the garment.
Here are some general settings to begin with on a heat press:
If your heat press is top heat only, you will need to do two pressings. However, if your heat press has top and bottom heat it would only be one step.
Top Heat Press Machines only:
TOP PRESS- This is when placing the Item on the fabric- Temperature: 135°C/140°C
- Pressure 90/100 PSI
- Time 5 to 10 seconds
BOTTOM PRESS- This is when you turn the fabric upside down with the item already placed.
- Temperature: 135°C/140°C
- Pressure 90/100 PSI
- Time 15 to 18 seconds
Bottom and Top Heat Press Machines:
ONE PROCEDURE
- Temperature: 135°C/140°C
- Pressure 90/100 PSI
- Time 15 to 18 seconds
Velcro Backing:
Finally we offer a Velcro backing which is popular among military and law enforcement as it allows for multiple patches to be interchangeable with a cap or uniform depending on the situation at hand. We recently had a customer that owns a bicycle shop and they choose to go with the Velcro backing for multiple patches and have heat pressed the soft side of the Velcro to multiple bicycle jerseys. Now they always have the appropriate patch no matter what jersey they are wearing.
Let our experienced team of designers and applicators hep you decide the best patch backing for your intended purposes, when planning next creative project.
Pros:
- Easy interchange between one garment and multiple patches:
Cons:
- The Velcro backing in permanently affixed to the back of the patch, rendering is somewhat useless for other applications.
Sticker Backing:
This is a fairly new backing technique in the patch industry. We spread a thin layer of "sticker" adhesive on the back of a patch and then cover that with sticker paper. The customer simply peels and sticks the patch anywhere they like. This gives the end user instant gratification as they are able to use the patch right after the purchase. No waiting until you get home to iron or sew it on to your favorite garments, with the sticker backing you can not only decorate your clothes, but really anywhere you can stick a sticker is perfect for a patch with sticker backing.
The sticker backing is great for promotional patches as you are able to hand them out and instantly see them in use at your function, meeting, or festival.
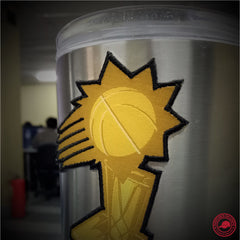
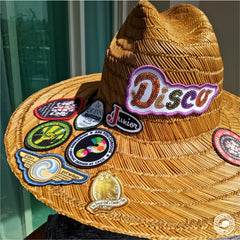
The sticker backing works best when the patch is applied to hard surfaces such as water cups, laptops, tough surfaces like a backpack, and garments that do not get heavily washed, such as caps and jackets. Sticker backing is great for adding a patch to a cap that already has a patch, as the sticker backing works great on the visor or the polyester mesh of trucker caps. The sticker backing may start to peel away from the garment after twenty to twenty- five industrial washes and it is best not to pick at it after being placed. You could probably rip it off if you had to, but it will leave heavy glue residue and could rip the garment, so its better just to apply and enjoy. After that just stick a needle to it and affix the patch like a normal patch with sewing.
Pros:
- Instant gratification for the customer.
- Place a patch anywhere.
- Great for promotional handouts.
Cons:
- It is not a permanent option.
- Edges of the patch may start to separate from the surface.
These are some different ways to apply the sticker backing.


